| << . 1 . 2 . 3 . 4 . 5 . 6 . 7 . 8 . 9 . 10 ... 17 . 18 . >> |
| Author |
Message |
TimJ
|
# Posted: 9 Dec 2011 12:03pm
Reply
old old buddy
I read about your smokey episode on your post. Wow, that seems to have really built up quickly! It must have been a really small screen.
Glad it didn't happen when you were sleeping there! Oh well, live and learn. And...yeah, a chimney fire clear up there would be more than devistating. We will have none of that!
Tim
|
|
Tim
Member
|
# Posted: 9 Dec 2011 01:19pm
Reply
I had forgotten the camera last night when I put in the wood stove, but I took a pic with my phone. I only have a stupid phone, with no internet. But....I texted it to a friend who then emailed it back to me this morning at work, so I will post a pic. Not sure how the quailty will be, but here it is:
|
|
oldbuddy
|
# Posted: 9 Dec 2011 05:59pm
Reply
Your stove looks very similar to ours. The name of ours is a "Long-wood Stove."
We have since fixed our stack and took the screen off. You're right....the screen was very small but I never gave it a thought. We put everything back together and fired her up! We had a nice fire for about an hour and had to leave. Once you leave it with a fire in it......you worry less and less each time. We put brick under the stove about two and a half feet wide by three and a half feet long. We put cement-board behind the stove on both sides of the corner 1/2" thick with 3" fiberglass insulation behind it. We put cinder-blocks along both sides of the stove in the corner staked up about four rows high for the heat to be absorbed and it seems to act as radiant heat. The cinder-blocks have about four holes in each block which allows the heat to rise in each block. I'm talking about the blocks which are 16"X8"X4." They resemble "cap-blocks" but they have holes in them eight inches long. We obviously set them on their long (16") edge parallel to the floor. It seems to work well and the blocks hold the heat for quite a while. Just "food for thought" but anyway.......I hope you'll be enjoying your stove in the very near future! Old Old Buddy
|
|
Tim
Member
|
# Posted: 9 Dec 2011 06:14pm - Edited by: Tim
Reply
oldbuddy
Thanks....well, I just couldn't wait any longer. I went out tonight after work and fired her up. I have cement board under it and up the wall beside it. There will someday be stone over the cement board. In the pictures, you can see a stone under each leg of the stove. That is so I can just go around the stove and set stone, without having to pull the stove to build the stone harth under it. It was ironic.....the first fire came on the night of the first snow. We have been really, really lucky this year not to have had snow yet. I was outside until dark putting batton strips on.
I came inside to warm up by the stove. I could hear this hissing sound and couldn't figure out what I was hearing. It was a really fine hale/snow mix that had turned the ground white around the cabin.
By the time the fire died down to just hot coals so I felt confident to leave it, the "white" had melted and gone away.
Here are some pics of my first fire.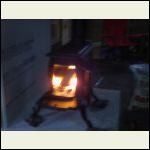
First fire in wood stove
| 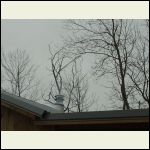
Yep, there is smoke there!
| 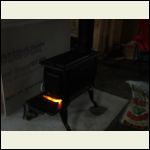
Zi6_6384.JPG
|  |
|
|
Tim
Member
|
# Posted: 10 Dec 2011 06:26pm
Reply
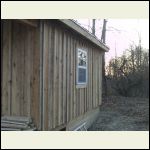
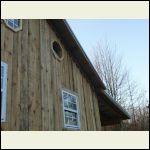
I got a bunch more baton strips put on today. The back is now totally done, and the gable end on the north-east side is half done.
I had a fire all day today in the stove. It sure was nice to have a place to go warm the hands and feet! :-)
Here are some new pics.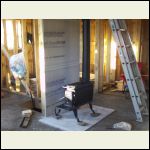
Zi6_6386.JPG
| 
Zi6_6392.JPG
| 
Zi6_6389.JPG
|  |
|
|
MtnDon
Member
|
# Posted: 10 Dec 2011 06:49pm
Reply
Stove seems mighty close to the wall. ???
|
|
Tim
Member
|
# Posted: 11 Dec 2011 07:00am
Reply
It's a very small cabin. Any further out from the wall and it would impede travel to the kitchen. The wall is now covered in 2 layers of cement board. It will have 3 inch thick stone on the face of it. I had the hottest fire possible yeasterday, all day long and the cement board got a little hot on the face, but I kept feeling the back where it contacts the studs and it was barely warm. With the stone on the face, it will probably not even get warm.
But...you are absolutly right, closer than I would have normally put it so that is why I did 2 layers of cement board. I should have mentioned that.
Thanks for your concern...
Tim
|
|
fthurber
Member
|
# Posted: 11 Dec 2011 07:47am
Reply
Nice cabin with lots and lots of real wood. Sawmill lumber?
|
|
|
Martian
Member
|
# Posted: 11 Dec 2011 07:58am - Edited by: Martian
Reply
Tim, I have the same type stove, oriented in the same way, in my little woodworking shop. It is within 13" of the wall. After several tries at keeping the wall cool, I came up with a piece of shiny sheetmetal attached to the backside of concrete board. This unit is mounted 1" off the floor and walls. While the face gets pretty hot, the wall behind it stays at room temp.
In my reading about woodstove installations, I learned that the problem of heating a wall is not so much that the face will catch on fire, but that the long term effect of relatively low heat drying the studs to the point where combustion is easy to obtain behind the wall face. It may take several seasons, but the wood gets really dry. I'm sure you've seen how dry and brittle wood gets around stoves in some of the older homes that have used wood heaters too close to walls for years.
I fully understand the space problem; my wood shop is only 12X20. I couldn't give up any more space than absolutely necessary. In the cabin, I bit the bullet ($1250) and bought a convection heat woodstove which can be placed within 8" of the sidewalls.

If your stove works as well as mine in the shop does, you'll be opening windows once you have all the holes plugged.:)
Tom
|
|
MtnDon
Member
|
# Posted: 11 Dec 2011 10:58am - Edited by: MtnDon
Reply
I was leading up to what Martian mentioned. When subjected to extended periods of heat that alone in insufficient to cause a fire the wood not only dries out to a great degree, the characteristics of the wood stud can change.
Cement board is not a good insulatol it does not burn but it does conduct heat through the material. Greater thickness may slow down the initial rate of heat transfer through to the studs, but then it also acts as a heat sink to keep those wood studs warmed up.
Back in the early 1900's when steam heating was popular various people noted that many building suffered fires in the areas where pipes penetrated wood. There have even been cases recorded where fires have occurred where hot water heating system pipes penetrated wood. The water in one one of those cases was only at 170 degrees F, not even as hot as in a steam system.
What has been figured out is a certain set od factors must be played out.
One; the wood must have intimate contact with the other non wood surface. That is the hot pipe or hot concrete, rock or cement board must pretty much exclude air from the contact point. A pipe in a too tight hole does this just as a cement board panel nailed to a stud does.
Two; the heat is applied cyclically, that is there is a heating up and a cooling off cycle. Cool does not have to be room temperature cold, just a lower temperature. Cycling as occurs in heating systems is such a heat/cool cycle.
Three, over time the wood contact erodes or increases slightly . This happens as the wood dries and slightly chars to a light brown. The increased clearance then permits air (oxygen) to contact that wood surface.
Four, one day the wood begins to char and smoke and the next thing you know the problem is life threatening.
I know someone who works at Reed College in the PNW. A few years ago they had a fire in one of their older buildings. The steam heating system pipes where the cause where they penetrated some wood members. It had taken many years for that to happen, but there are also many recorded fire events that did not take so long.
I concur that space is at a premium in a small structure. We faced the same issue with our 15.75 x 30. I considered what looks like the same stove you have but gave it up as undesirable because of the clearance issue. The stove we used cost much more but I have no fear about fire danger.
I wanted to make note of this because there are many inexperienced folks looking for answers to building questions, and many of those folks believe that if someone else has done something, then it must be safe or good practice.
References, for anyone who is interested.
FIRST PAPER
A SECOND PAPER
A THIRD
G/L
|
|
CabinBuilder
Admin
|
# Posted: 11 Dec 2011 12:31pm
Reply
Tim,
I do understand small cabin size limitations - have same issue. At least consider adding a metal heat shield along the wall - 1" from the wall, elevated 1" from the floor.
Wood stove safety clearances.
|
|
MtnDon
Member
|
# Posted: 11 Dec 2011 01:38pm
Reply
I've used 24 ga sheet metal on the installation in our gazebo. That does work very well at reducing the heat that gets through to the materials behind the shield. It's almost amazing the difference it makes. I used flat metal the same color as the metal roofing we used.
|
|
Martian
Member
|
# Posted: 11 Dec 2011 01:55pm
Reply
Mine, in the shop, is a 29ga galvalum flat metal piece left over from a job. It is amazing the difference it made. The wall behind the shield is an outside wall; it is cool to the touch even when the stove is roaring.
Tom
|
|
Tim
Member
|
# Posted: 11 Dec 2011 05:48pm - Edited by: Tim
Reply
CabinBuilder
MtnDon
Martian
So, to keep the look of the stone wall, what if I attached a sheetmetal heat shield to the side of the stove that faces the wall, spaced maybe half the distance to the face of the stone for air flow? I could then paint it with heat proof flat black paint like the stove and it wouldn't be so "out of place".
Tim
|
|
MtnDon
Member
|
# Posted: 11 Dec 2011 06:32pm
Reply
What is the manufacturers rated clearance? That looks like a Vogelsang and from I remember they state 26" or more depending on the model.
The metal shield spaced out one inch from the combustible wall should be high enough that the top edge of the metal is no closer than that minimum clearance from the stove manufacturer. Some info I have reads 20" or more. Placing the heat shield closer to the stove would likely mean it should extend above the top level of the stove; not too attractive. I don't know what to suggest; I do think the one inch spaced off the wall 24 gauge metal shield is the best, and even then the stove is really too close to the wall. (24 gauge is the recommended thickness IIRC.)
If you want to try a heat shield closer to the stove I'd only space it a few inches off the stove and see how that works. If getting close to the stove I'd avoid any galvanized metal. I'm not sure of the temperature when it becomes an issue, but I do know that welding on galvanized releases fumes that can make you very sick. High enough doses of zinc fumes can kill. I doubt a wood stove would kill anyone from zinc fumes, but am not sure about if it would be enough to make you sick.
I've seen a very nice installation using a copper sheet as the wall protection. Pricey but very nice.
|
|
Martian
Member
|
# Posted: 11 Dec 2011 07:02pm
Reply
Tim, my suggestion: put one layer of cement board on the wall from the floor up 4'; paint it a light color. Space a second layer of the same size cement board 1" off the wall and 3" off floor with ceramic/noncombustible spacers, but put a metal heatshield on the back side, The metal can be held in place by the fasteners thru the standoffs. Use expanded metal to cover the gap around the sides and top of the heatshield; paint it to match. Then build your brick wall with spaces between the bricks at the bottom for ventilation. You could hang a thermometer behind the shield to see how effective it is.
Did you use double wall stove pipe? If not, then you should probably either put a reflector on the wall side of the pipe or take the shield up the wall to the ceiling.
As always with any idea that may not conform to acceptable standards, YMMV.
Tom
|
|
trollbridge
Member
|
# Posted: 11 Dec 2011 07:22pm
Reply
Just curious about this...what if the other side of the wall were to be left open enough so it could vent the warm air out(like louvered or something similar). Not sure what is planned for the other side but do you guys think that could work as a solution or would the studs being in contact with the cement board still get too warm and therefore dry out? Curious too if a 1" airspace would be enough in this situation to make a big enough difference cause I bet 1" of space wouldn't be missed.
|
|
Martian
Member
|
# Posted: 11 Dec 2011 07:45pm - Edited by: Martian
Reply
TB, taking your idea one step further, depending on what that wall does, it might be that opening a hole in the wall would be the best idea. But, I don't know what is opposite of the stove thru that wall.
As far as just leaving the studs bare on the backside, there would still need to be some kind of heat shield, IMO.
Tom
|
|
Anonymous
|
# Posted: 11 Dec 2011 10:35pm
Reply
I would be wary of installing a stove contrary to the manufacturer's recommendations. I just installed the wood stove in my off-grid and unpermitted cabin and was reading the local jurisdiction's web site regarding wood stoves. They will bill the owner for any costs incurred when putting out a fire caused by an improperly installed wood stove. So be careful.
I'm all for freedom, self-reliance and doing things our/your own way. But researching risks and responibilities fully is part of this way of life. That is one of the main reasons this forum is so good.
BTW, Ive been reading this forum for the last year and a half and now have my cabin 90% complete. For some reason Iv'e been too lazy or reluctant to post pictures and chat with you all. I'll become a member soon and post some pics.
|
|
oldbuddy
|
# Posted: 11 Dec 2011 10:47pm
Reply
Tim................I'm sure you won't have any problems with it as long as you keep the flue cleaned out on a regular basis and burn hard wood most of the time. It looks mighty comfortable inside. We still need to insulate and put up our pine tongue and groove. I don't want to even think about all the things I "could" worry about. You have a beautiful cabin and it appears that you have made it as safe as possible. Enjoy it. Period! Old Old Buddy
|
|
Anonymous
|
# Posted: 12 Dec 2011 01:53am
Reply
My previous post was meant to be a friendly word of caution, not criticism. We all build things our own way and share our experience and talents and skills. We also share cautions and concerns and sometime criticisms. But in regards to wood stove placement, I'm just suggesting caution and care. There are always alternatives, many of which we learn here. Proceed with caution and then enjoy the fruits of your labor.
|
|
Tim
Member
|
# Posted: 12 Dec 2011 05:35am
Reply
Well, I was looking at it yeasterday. I think I can extend to "harth" out a little and move the stove out some. That, along with the addition of a nice thick layer of stone should do the trick.
There is really more room there than I was picturing. We will just have to get used to walking around it more after tripping on the harth a few times. lol
|
|
Martian
Member
|
# Posted: 12 Dec 2011 06:52am
Reply
I just hope the hearth isn't between your bed and the bathroom! That's gonna hurt!:)
Tom
|
|
Kramer
Member
|
# Posted: 13 Dec 2011 03:07am
Reply
Is the wall that the stove is against load-bearing? Can you replace the wood studs with steel studs?
|
|
Tim
Member
|
# Posted: 13 Dec 2011 05:17am
Reply
Kramer
Good thought, but yes, it is load bearing.
Tim
|
|
Martian
Member
|
# Posted: 13 Dec 2011 08:54am
Reply
Tim, what about headering across the wall and filling the space next to the stove with brick?
Tom
|
|
Tim
Member
|
# Posted: 13 Dec 2011 06:42pm - Edited by: Tim
Reply
Martian
That is a good idea too. I think now that I moved the stove out more, it will be fine with the stone on the wall. I am going to run the cement board clear up to the ceiling too.
|
|
Tim
Member
|
# Posted: 13 Dec 2011 06:46pm
Reply
I have been working on batton strips for ever this week! Finely, I am one the last gable end, and it is half done. I should definetely finish the last of the batton strips by Thursday. Then I will begin insulating the inside. Can't wait!
Tim
|
|
customrunner
Member
|
# Posted: 13 Dec 2011 07:50pm - Edited by: customrunner
Reply
Tim, cabin looks great love the board and batton and the gable windows add a nice contrast, whats your plan for the sofit.
|
|
Tim
Member
|
# Posted: 14 Dec 2011 05:21am - Edited by: Tim
Reply
customrunner
Thanks for the compliments!
The sofits will be boxed with wood. If you look closely, at the top of the batton strips, I ran a strip parallel to the rafters. The sofit board will sit on that strip and be nailed under the floating rafter. That part might have to wait until spring though.
Tim
|
|
| << . 1 . 2 . 3 . 4 . 5 . 6 . 7 . 8 . 9 . 10 ... 17 . 18 . >> |

