| << 1 ... 9 . 10 . 11 . 12 . 13 . 14 . 15 . 16 . 17 . 18 . >> |
| Author |
Message |
toyota_mdt_tech
Member
|
# Posted: 15 Apr 2021 05:10pm
Reply
Shelter pics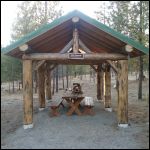
shelter12.jpg
| 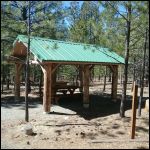
shelter7.jpg
| 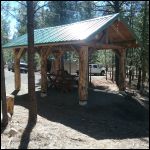
shelter6.jpg
| 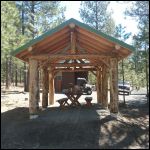
shelter5.jpg
|
|
|
toyota_mdt_tech
Member
|
# Posted: 15 Apr 2021 05:20pm - Edited by: toyota_mdt_tech
Reply
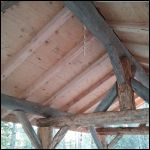
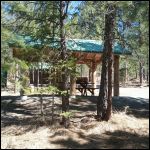
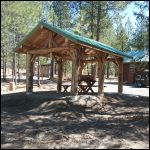
Rafter shots and a few more. Those "silvered" logs from weather, when sprayed with bleach in a pump sprayer turns a brand new blonde color almost as fast as you spray it on, looks like it was just fresh peeled. I did a few, will finish ridge and ridge supports.
Notice the "H" clips on the plywood. 
After adding all that weight above, structure with lots of force, did barely move, I took all the diagonal braces, added a second 10" timberlock screw to it at a different angle and it is now rock solid with zero movement at all.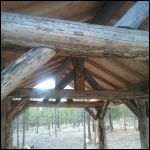
rafter2.jpg
| 
rafter1.jpg
| 
shelter2.jpg
| 
shelter4.jpg
|
|
|
paulz
Member
|
# Posted: 15 Apr 2021 05:40pm
Reply
Lookin good Ranger T
|
|
Nobadays
Member
|
# Posted: 15 Apr 2021 06:05pm - Edited by: Nobadays
Reply
Very nice! 
|
|
toyota_mdt_tech
Member
|
# Posted: 16 Apr 2021 12:53pm - Edited by: toyota_mdt_tech
Reply
Well, as some of you remember, the original plan was for a 12X16 shelter, the reason it got narrow was due to the slope I was building on and I didnt have long enough sono tubes, so narrowed it up to 10 feet wide.
This turned out to be a huge money saving event. All my rafters, I was able to use 8 footers and only cut off around 4" total which left me decent overhang.
I had little waste on my plywood, total roof length was 20 feet, so 10 sheets did it, I cut just a sliver off the top row of plywood. The rafter tails I cut off was perfect firewood blocks for my little wood stove and the evening temps dropped to the teens, so I ended up burning that all up (kiln dried douglas fir) and I have just a small sliver sections of the plywood which I put into my wood scrap box out there.
Anyway, anyone planning on building, think of dimensions that make for little waste. Also gable end panels diagonally cut, you can use the top part cut off for the opposite side, plan all around that. Lumber that was over 8 feet jumped way up in cost, but even the 8 foot stuff was stupid spendy.
I had lots of planning into this, coordinating vacation and all my free labor buddies, plus the log frame up in the weather, I was not going to postpone it, but I am not doing any building projects till this pricing settles down.
Total materials was:
22) 4X4X8 untreated doug fir
10) 15/32 plywood sheets
4) 2X6X10 doug fir (end of rafter tails)
4) 3/4"X6"X8 facia trim for gable ends
2) rolls of 30# felt underlayment
|
|
gcrank1
Member
|
# Posted: 16 Apr 2021 08:30pm
Reply
Premium build, in more ways than one!
|
|
toyota_mdt_tech
Member
|
# Posted: 18 Aug 2021 08:05pm - Edited by: toyota_mdt_tech
Reply
OK, got back from cabin, left behind 2 more of those "Pilot Rock" picnic tables with the 1 5/8" tubes, much cheaper than the first kit I bought with the 2 3/8" tubes. Same exact table kit otherwise and about $100 less. I got these from Amazon with 6 bucks shipping put it right at 175, plus the lumber. Kit called for 5 of the 2X10, I used 3 and 2 of the 2X12 for the seat. ADA compliant, makes it much easier to climb in and out of.
Next, got my 125VAC 30A inlet for cabin, when I built cabin, I stubbed out a large 10AWG 4 wire down in the crawlspace from breaker panel, that will be my input now, this also doubles as a junction box for the feed to my shelter, which will require a small breaker panel out there. Maybe 2 space load center, a couple of 15A breakers for outlets and other for lighting/fans. 1" conduit all in place and buried/backfilled.
Brought one of those harbor freight mid sized jack hammers, made trenching an absolute breeze.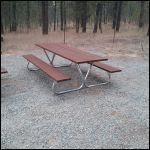
ADA_Pilot_Rock_Picni.jpg
| 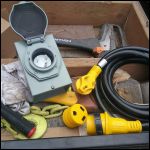
inlet30A120VAC.jpg
| 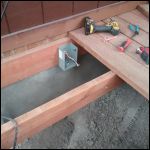
access_10AWG3wiregr.jpg
| 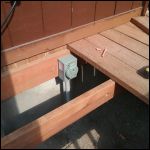
box_mounted.jpg
|
|
|
toyota_mdt_tech
Member
|
# Posted: 18 Aug 2021 08:14pm - Edited by: toyota_mdt_tech
Reply
And final picture of conduit in place stubbed out behind log shelter upright. I ran conduit on the backside, would not look good seeing a chunk of conduit coming up one of the log supports from the front view.
Run was about 60 feet total. I will pull in 4 wires, 10AWG THHN multi strand, a red, black, white and a green. Red will be unused, but I am pulling it in anyway.
My mini AC unit for my small windows. Got a Ftridgidaire from Home Depot, wanted all manual knobs, no solid state, no remove control BS and it needed to be compact. Man, worked great. I know, its crooked. The keys to lock into track at bottom had a metal pad on the one side, only option was to hammer it flat, was made that way, short sighted? I left it, didnt feel like hammering on a new AC unit.
Oh, Honda EU2000i just barely noticed it, ran slow speed and still quiet.
Added black barrel above shower, we fill like barrel from solar well, then transfer it into this barrel and it gets warm with sunlight and we have a nice water pressure for showers with no need for my My Heater aqua cube, but I do bring it anyway.
Final is unrelated, but buddy of mine had to borrow my car trailer to pick up an old 1941 Ford Business Coupe Deluxe that was in a evacuation zone for fire, he picked it up a day before evac orders came. Its all original, but restored original. Flathead V8 3 on the tree.
The owner, buddies father in law decided to sell it to him, he is too old to take care of it, so this was the time. He hated to see it go, gave it a kiss. I suspect after the fire passes, he will bring it back for safe keeping at his place for now.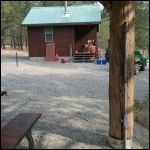
conduit_buried_viewf.jpg
| 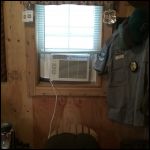
AC_installed_crooked.jpg
| 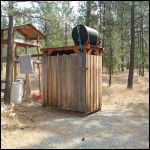
shower_tank.jpg
| 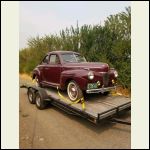
41Ford_BizCoupeDLX.j.jpeg
|
|
|
|
toyota_mdt_tech
Member
|
# Posted: 18 Aug 2021 08:22pm - Edited by: toyota_mdt_tech
Reply
Lots of wildfires around me, some very smokey days, few nights, smoke settles in like a thick dense fog, visibility very short. Very windy on Tuesday, cleared it out, but was back next morning. So far, 20 miles north of me and 20 miles west, all conditions so far been favorable. Containment starting to show up now, great sign and some cooler weather and rain for the weekend.
|
|
paulz
Member
|
# Posted: 19 Aug 2021 09:51am
Reply
Good luck man. Smokey here too but no nearby fires.
|
|
Ol Slim
Member
|
# Posted: 21 Aug 2021 12:22pm
Reply
Quoting: toyota_mdt_tech OK, got back from cabin, left behind 2 more of those "Pilot Rock" picnic tables with the 1 5/8" tubes, much cheaper than the first kit I bought with the 2 3/8" tubes. Same exact table kit otherwise and about $100 less. I got these from Amazon with 6 bucks shipping put it right at 175, plus the lumber. Kit called for 5 of the 2X10, I used 3 and 2 of the 2X12 for the seat. ADA compliant, makes it much easier to climb in and out of.
First off , I love your project and the Forest Service styling. I noticed you mentioned the picnic tables being ADA compliant. If this is something that you take into consideration , you might consider making the table boards longer on the top. Just enough to extend out on one end to allow someone in a wheelchair to belly up to the table on the end. I am confined to a wheelchair but spend as much time outdoors as i can . I find this style table super handy. Anywho , keep up the awesome build ! I really enjoy it !
|
|
toyota_mdt_tech
Member
|
# Posted: 21 Aug 2021 01:35pm - Edited by: toyota_mdt_tech
Reply
Slim, good point. I do not have a concrete pad, but a wheel chair at the end is a good point. I followed the directions from mfg, they said 12" inward on the 8 foot table, if I built it to 6 foot, it was even less. I could of extended the table top but keeping the benches in the same location (10 foot lumber cut back to 8' 6" maybe). The ADA on this was just being able to walk through it vs climb in, I thought. But you make a good point. I plan on replacing all the wooden frames picnic tables with these, site 1 is next to the well, very flat, would be the best location for the wheel chair accessible table. I will extend the ends to 18" from 12", do it on both ends, but keep bench the same length
Now looking at the photo below, the design of the pipe, could the 2 foot place holders on a wheel chair flip up and pass through there? It looks like it may have been designed for that also?
What depth of surface, I suspect 18" would be good, usually space from a table to to top of a seat is 12".
|
|
Ol Slim
Member
|
# Posted: 22 Aug 2021 02:23pm
Reply
Toyota ,
Sounds like you have a perfect grasp on what I was talking about. I do think that 6 more inches would be right on point and make it work well, not too much but just enough. Looking at the orientation of the pipe , I do think think it would certain help in clearance for most chairs . Hats off to you sir for taking the mobility challenged into consideration !
|
|
toyota_mdt_tech
Member
|
# Posted: 21 Apr 2022 07:07am
Reply
OK, looks like the saga will continue. Its 4AM, all ready, load my clothes bag and pulling out. Should be there before noon.
Pictures coming when I return in a week.
|
|
gcrank1
Member
|
# Posted: 21 Apr 2022 09:31am
Reply
We'll leave the light on for ya 
|
|
BRADISH
Member
|
# Posted: 21 Apr 2022 10:41am
Reply
Quoting: toyota_mdt_tech OK, looks like the saga will continue. Its 4AM, all ready, load my clothes bag and pulling out. Should be there before noon. Pictures coming when I return in a week.
Glad to hear that.
I'm headed up to the cabin this evening after work, but only for a few days (weekend warrior life is tough). Best of luck to both of us!
|
|
toyota_mdt_tech
Member
|
# Posted: 23 Apr 2022 11:52am
Reply
Ok. At cabin now on cell phone. Cold nights and snow flurries by day with some nice sun breaks.
Wiring in shelter done..all done in gray conduit. I used one of those heated wraps to form the conduit. Kept wiring all up high so not to ruin the rustic log structure. I need to tie underground feeder into cabin panel. Ran wire long ago during construction planning ahead. Small subpanel in shelter to 2 15a circuits. Lighting one one, outlets on another.
Pictures coming. Fans.hung today.
But i need to run fence line and repait any winter damage, trim branches over assoc road for clearance for buddys motorhome.
Then drop and skid beetlekills.
Last. Help local get his F350 4x4 flatbed running
|
|
toyota_mdt_tech
Member
|
# Posted: 23 Apr 2022 11:38pm - Edited by: toyota_mdt_tech
Reply
Sundown with shelter lit up. Just a teaser. 
Sorry about sideways picture. Ill fix it when i get back and add more pictures.
|
|
FishHog
Member
|
# Posted: 24 Apr 2022 05:33pm
Reply
looks very nice even sideways.
|
|
gcrank1
Member
|
# Posted: 24 Apr 2022 08:11pm
Reply
Guess you left the light on for us 
|
|
toyota_mdt_tech
Member
|
# Posted: 26 Apr 2022 04:55pm - Edited by: toyota_mdt_tech
Reply
OK, got to the cabin, pulled up 2 planks on the porch to access inlet plug which I also used as a junction box to the shelter. I pulled 10AWG wire in 1" conduit I buried last summer and capped off. Ran my Klein 100 foot fish tape, was a breeze. Once in, I ran it to the small 2 space breaker panel, dividing up the 30A circuit into 2 15A circuits, one for lights/fan, other for outlets.
I ran all 14AWG in shelter but from switches to fans, I ran 14-3 w/ground so I can operate the fan or the lights with its own switches. I have 2 fans, one at each 8X10 section/bay, one dual switch for one end, same for other.
One of the best investments i made was buying a PVC conduit heater blanket, made short work out of running the conduit and forming it to the logs and irregular shapes etc.
After all conduit was in, pulled all wire in place, went well, was a breeze. Tied system into cabin panel with 10AWG and a new 30A breaker. I had ran this wire into the panel long ago during construction, ran a 14AWG wire into attic, you just never know. It paid off.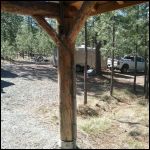
Feeder coming from underground
| 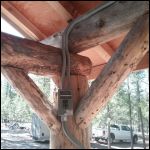
S curve to panel
| 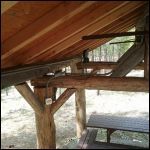
overhead of conduit
| 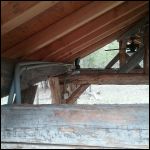
another overhead of conduit
|
|
|
toyota_mdt_tech
Member
|
# Posted: 26 Apr 2022 05:00pm
Reply
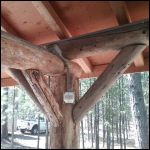
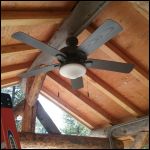
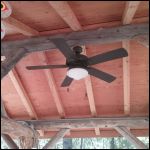
I kept panel and boxes up high, I didnt want a chunk or two of conduit down each post. Even the feeder I ran up the backside of the post as viewed from the front to hide it as toy looked at the front opening.
Same for switches and outlets. The fans really moved the air, so pre set them to blow down and on medium speed which creates a nice breeze, should keep skeeters and wasp away too.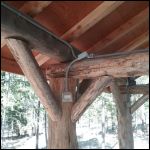
front bay fan/light switch
| 
rear bay fan/light switch
| 
front fan
| 
rear fan
|
|
|
toyota_mdt_tech
Member
|
# Posted: 26 Apr 2022 05:05pm - Edited by: toyota_mdt_tech
Reply
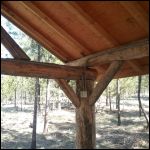
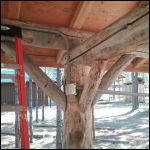
3 outlets, one at left back corner, right back corner and right mid post. No more. The outlet at mid right post, I could run a chunk of conduit down to the ground and maybe power up my container with some lighting. Its a possibility.
The RH mid outlet, ignore that conduit past it, was just storing it temporarily int he gusset braces.
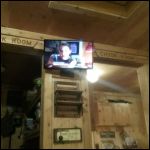
Oh, I did upgrade the TV inside the cabin from 15" to a 24". But realized it didn't have a DVD player built in like I wanted, so bought a mini compact DVD player and will set it up on the shelving under the TV. Crystal clear digital picture too. (Young Sheldon was on TV)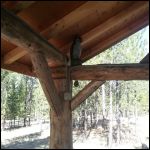
LR outlet
| 
RR outlet
| 
RH mid outlet
| 
TV
|
|
|
toyota_mdt_tech
Member
|
# Posted: 26 Apr 2022 05:06pm - Edited by: toyota_mdt_tech
Reply
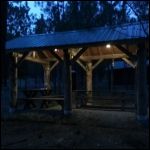
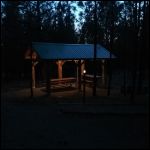
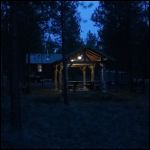
And I stayed up well past my bedtime to get a few sunset pictures.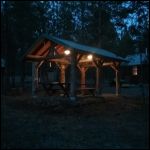
20220423_202455.jpg
| 
20220423_202430_resi.jpg
| 
20220423_202735.jpg
| 
20220423_202652.jpg
|
|
|
gcrank1
Member
|
# Posted: 26 Apr 2022 07:40pm
Reply
Outstanding!
|
|
toyota_mdt_tech
Member
|
# Posted: 26 Apr 2022 09:48pm - Edited by: toyota_mdt_tech
Reply
On another note, I had an issue with a woodpecker, he knocked a few holes in some corner trim. I sealed the holes, gave the finish a wood grain and painted it. I can see there they were doing exploratory work in other areas, but not penetrated my 5/8" siding.
So seal all nicks, painted and installed these flashing eyes on a swivel gall Bird Be Gone.

It seems to have worked, no more trouble from the woodpeckers.
I have a total of 20 all around the edge of the roof, 5 on gable ends, 5 down along rafter tails on each side.
|
|
paulz
Member
|
# Posted: 26 Apr 2022 10:59pm
Reply
Looks fantastic TMT.
|
|
toyota_mdt_tech
Member
|
# Posted: 16 May 2022 09:28pm
Reply
Ok. At cabin now. All closed up for an early departure. Will upload pictures of the painted shelter tomorrow eve.
It turned out so nice.
|
|
toyota_mdt_tech
Member
|
# Posted: 17 May 2022 03:48pm - Edited by: toyota_mdt_tech
Reply
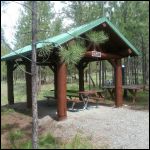
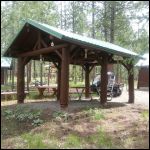
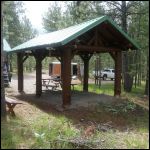
OK, pulled in Friday around 11AM, was cold, got place opened up, unpacked etc. Sat paint day was too cold, 42 degrees, so held off, spent all day Sat prepping the logs, included scraping any bark bits off, loose chunks, scale, wire brushing any discoloration, really cleaned and smoothed out the logs. Sunday AM, cool still, but running out of time, had to paint. Suspect it was 49 degrees with some rain drizzle on and off. Paint dries best when its low humidity and good temps. I had neither.
So painted it, then reinstalled fan assy, turn them to spin backwards, helped dry it some, then went downward and let them run for a long time.
Monday AM, nice clear morning, sun pops out, super warm, paint dries, I go behind with my brush and get all spots missed and it turned out so nice.
Would of gotten an after dusk shot, but went to bed AT 7:30, Departed at 5am. Home now.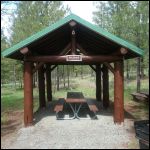
20220516_114157_resi.jpg
| 
20220516_114245_resi.jpg
| 
20220516_114313_resi.jpg
| 
20220516_114351_resi.jpg
|
|
|
toyota_mdt_tech
Member
|
# Posted: 17 May 2022 03:48pm - Edited by: toyota_mdt_tech
Reply
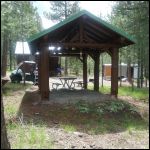
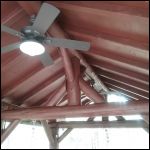
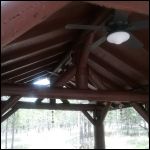
Few more pictures.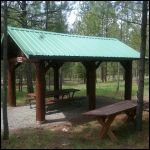
20220516_114222_resi.jpg
| 
20220516_114330_resi.jpg
| 
20220516_115923.jpg
| 
20220516_115931.jpg
|
|
|
| << 1 ... 9 . 10 . 11 . 12 . 13 . 14 . 15 . 16 . 17 . 18 . >> |

